Welcome back!
I hope you've all been practicing your embroidery skills, because this week we'll be making a super fun embroidery project. :-)
My project inspiration came from an adorable skunk pillow
I found in Sew & Stitch Embroidery, by Alyssa Thomas.
Cute, right?? I love the idea of a basic shape, requiring basic cutting/sewing skills, with the details coming from embroidery.
I decided to combine this idea with the little fox I made earlier this year.... Every pillow needs legs, right?
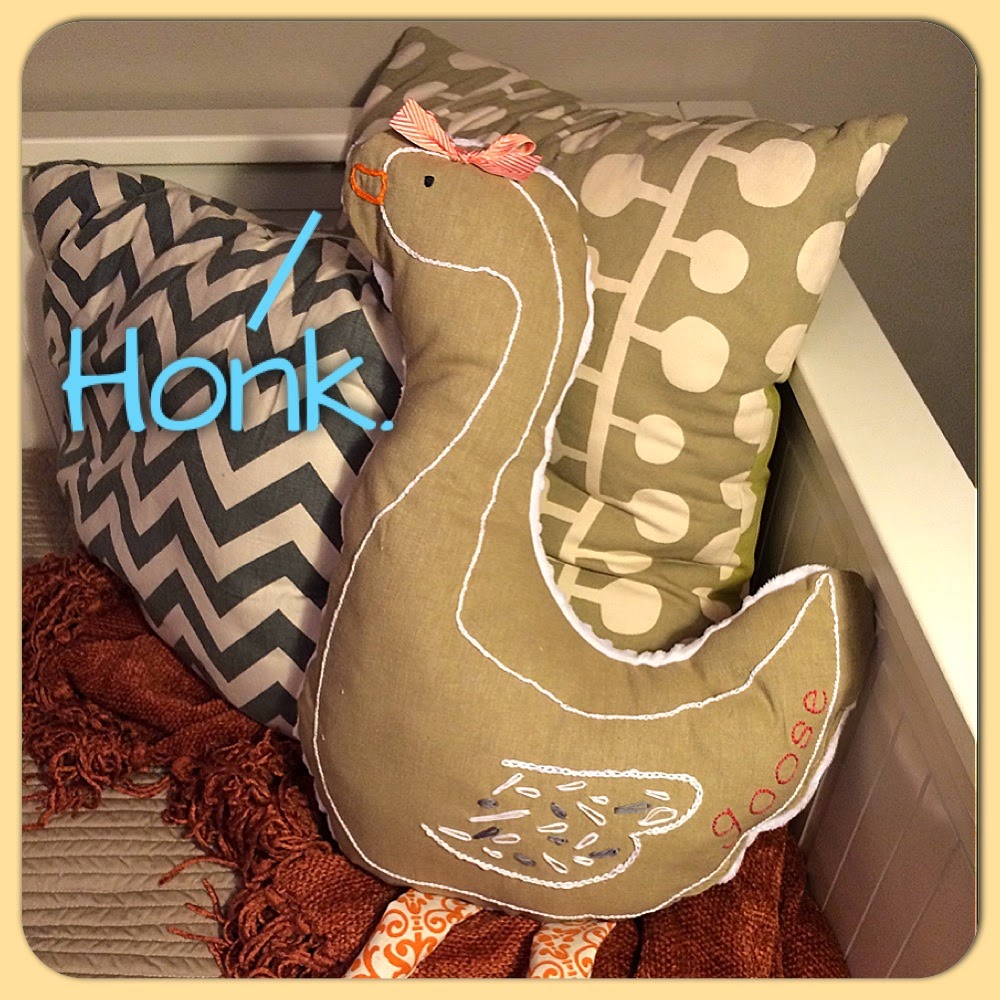
I made this project for a special little lady who turned 1 this week... I figure if your nickname is "Goose", you should also have a soft squishy goose for a friend.
So, here we go!
First thing's first... pick your fabrics. I raided my fabric stash for this one to avoid the risk of going bananas in a fabric store. :)
I wanted a sturdier cotton fabric for the embroidered side of the pillow, and a soft minky fabric for the back. You can embroider on any fabric, but some are easier than others. Soft or stretchy fabrics like minky require stabilizers to keep your stitches from becoming uneven and wrinkled. The books I mentioned last week have good information on the different stabilizers available if you go that route. When I can't figure out what I need, I also find the staff in fabric/crafts stores to be really helpful. :)
Ok, with your fabric selected, it's time to draw your design. I looked at some clip-art photos of geese, and drew the basic shape with pencil on the fabric. You can use a washable or disappearing ink fabric marker to go over it. Since I had to draw it a couple of times, I decided to use a permanent marker to go over the lines, so that I could embroider on the opposite side of the fabric. That way I could hide all of my pencil lines.
Now, pull out your hoop--it's time to stitch!
(I used crochet thread for the white outline and embroidery floss for some of the feathers, the beak and the wording.)
I used a split stitch for the outline and beak:
Chain stitch for the wing outline, and single chain stitches for the feathers (this is the same stitch to make a lazy daisy stitch):
French knot for the eye:
Backstitch for the "goose":
Now it's pretty much done!
PS: Check out the post from last week for a refresher on these stitches!
*Note: I used an iron to remove the creases from the hoop, but try not to iron directly over your stitches. If you do, you might lose the pretty 3-D effect of the stitches. :)
Of course, she needs an accessory.... sew on a ribbon bow, and she's perfect!
Now for the legs.... (this is exactly what I did for the legs in the stuffed fox post. )
Draw and cut 4 identical pieces.
Sew them with right sides together, leaving the top open.
Turn inside out, stuff, and done!
Now you're ready to assemble!
Cut out the fabric for the back of the pillow, making sure that the right sides of the fabrics are not facing in the same direction when you trace.
Pin your fabrics together, right sides together, and also pin the legs. Make sure the "toes" are on the inside of your pillow, so that when you turn it out, the legs will be going the right way.
Sew away!
Remember to leave an opening as you sew the perimeter, so that you can turn the pillow inside out.
Stuff the goose!
Now you just need to sew it closed, and you're done! I decided to try to use the machine to close this seam, but I definitely would have gotten a straighter seam if I had hand-sewn it. :) Laziness has its draw-backs, but I'm ok with that. :)
Ok, she's done!
You can make a fun pillow friend with any shape, and any animal embroidered on the front! Be creative and have fun!
Also, before you get started, find yourself a great, supportive chair with lighting to shine over your shoulder as you embroider! Otherwise, you can be sure you'll need to visit your chiropractor after you're done. :) Trust me.
Thanks for reading, have a great weekend!


No comments:
Post a Comment