
Happy Memorial Day weekend everyone!
To celebrate the holiday, we're making an extremely quick and easy craft! You need all the time you can get at the pool/lake/beach/parade/picnic... etc. :)
This was inspired by a Pinterest pin that I've had on a board for ages. It's a little bit nostalgic for me because my mom used to make really fabulous braided ribbon headbands for my sister and me, way back in the day. ...And I'm not kidding when I say fabulous. :)
I still love headbands, and this is a great, easy way to update old headbands that you don't like and use up leftover fabric scraps.
I used scraps of jersey knit from the square-circle skirt project. It's stretchy and perfect for making a headband. If you have any old t-shirts you don't like to wear anymore, you can cut it up to make one of these headbands! :)

Let's get to it!
Materials:
-Scrap fabric (I used jersey, but any material would work... lace, cotton or whatever you have on hand!)
-Hot glue gun
-upcycled or plain headbands
-needle and thread (optional)

Ok, to make the headband, you'll need one strip of fabric about 1.5 times the length of the headband you're covering.
Glue to secure the fabric on one end of the headband and start wrapping the fabric around it. Use glue as needed along the headband to keep the fabric from sliding.


Glue at the other end and trim any excess fabric.

Lovely!
You could stop here-- I think this headband is already fun!
To make the braid, you need three strips of fabric. I tied a knot in one end to keep the ends together.

If you're a nurse and a hoarder, like me, you may have a pair of hemostats lying around, that you can rig up to make the braiding easier. ;) If not, I'm sure you'll come up with a creative way to hold the fabric so you can braid it. :)


Once the fabric is braided, make sure the braid matches up well to the headband. You may need to go back and make the braid looser or tighter to line up better with the edges of the headband.

I tied a knot in the other end, and then glued the braid to the headband. Use the glue to press down on any "flappy" edges. :)


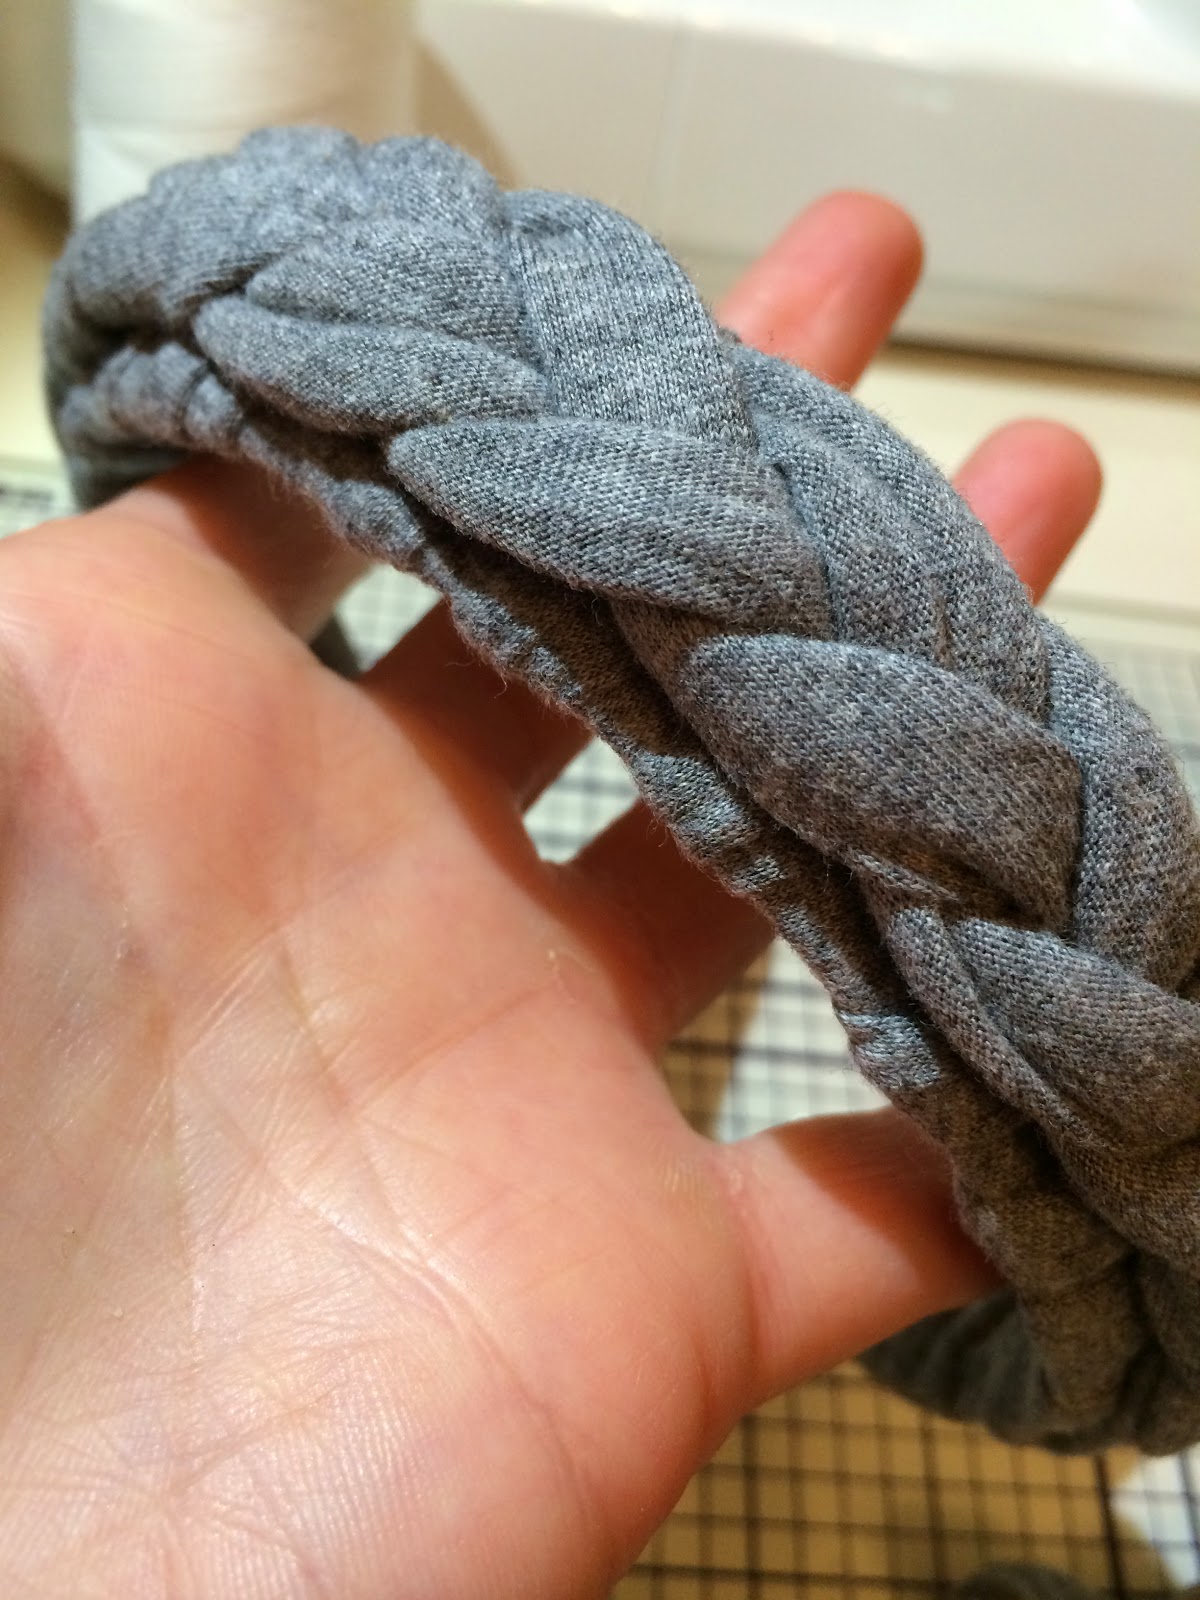
Done! I think it's pretty cute!
(Disclaimer: I'm not great at selfies. If anyone wants to be a future blog model, let me know.) ;)

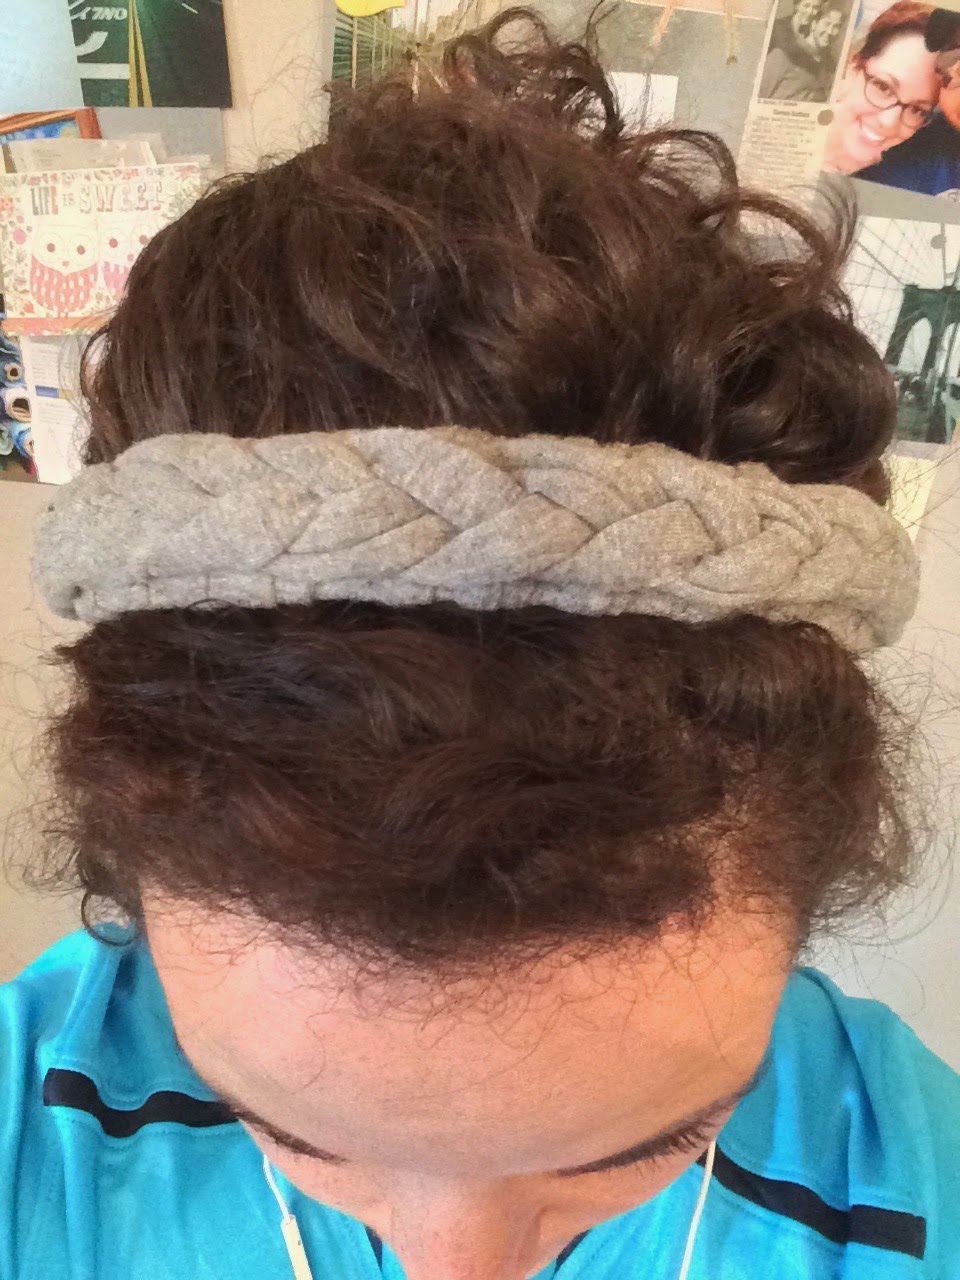
Now, if you want a little variety, you can also make a stretchy braided headband. This would definitely work best with any jersey knit.
Just make the braid a little longer than you did for covering the headband, and when it is the desired length, sew the ends together.


See?

I absolutely love the athletic headbands you can find like these:

But who wants to pay this?

Umm, not me.
This braided headband is an awesome alternative! Since it will be custom-made for you, by you, it will be a lot less likely to slip off of your head. :) The store-bought headbands are usually just a little too tight for me, which means they pull my hair, rather than holding it, and then they slide back. Not my favorite look.
So, have fun and take 5 minutes to make a headband! You'll love it. :)

Have a great weekend!

No comments:
Post a Comment