Hello and Happy Friday to you!!
I hope you're all well, and maybe your life is even brighter because it includes a felt cupcake or two? :)
We had some interesting "cooking" lessons from our nephews this week-- Hopefully you had some fun too!


Anyways, today we will be continuing in our month of felt fun with an homage to our Irish roots and our love of rhyming doctors.
Confused? Just hold on....
Pull out your boxes, foxes, boats and goats.... today we're celebrating St. Patrick's Day a few days early and honoring the much-loved Dr. Seuss with, what else?.....
(Felt) Green Eggs and Ham!

Why, you ask?

.... Well, why not?
#1-Green is a completely lovely color! (And if you carry these around on Monday, no one will pinch you.)
#2-If you have an elementary-age kid in your life, you know that earlier this month, we celebrated the birthday of Theodor Seuss Geisel, aka, Dr. Seuss! What more reason do we need to make green eggs and ham?
**And trust me, the felt version is much more appetizing than the real thing.
Green food coloring and eggs are not a good combination.
So, are we ready? Good!
I realize that this is a completely ridiculous project, but let your imagination run wild, and have fun! I mean really, what sense does a cat wearing a hat, or a fox wearing socks make? Pretty much none... so just go with it.
**And think of the birthday gift possibilities for a loved little one in your life--- a fun book with felt food to match? Super fun! (Thanks for that idea, Danielle!)
Ok, enough with the intro.... Here's the how-to:
For this project, you'll need:
-White felt for the eggs
-Green felt for the ham and egg yolks
-Needle and Green embroidery thread to match your felt

The eggs are the easiest and quickest to make. I've tried a couple of ways to make sunny-side-up eggs, so you can choose whatever works for you!
The first time I made eggs, I just cut the curvy shape out of white felt, then stitched on the yolk with a running stitch and a little bit of stuffing to make the yolk a bit more 3-dimensional. Super easy, and it took about 5 minutes.

This time I made the eggs with two layers of white felt, which made them a bit more substantial.
Trace your egg shape and cut out two identical pieces.

Now sew these together along the edge, leaving at least 1-2" open.

Now turn it inside out and close the remaining seam, either with your sewing machine, or with a whip stitch, like we used last week.
I didn't use any stuffing for these eggs, but you can!

Now, for the yolk, pick the green felt of your choosing and cut out a small circle.
I just used a green embroidery thread and sewed it on with a running stitch. Stop sewing before you complete the circle, and add a tiny bit of stuffing. (Or keep your felt scraps handy, and stuff them with the leftover scraps! Waste not!) :)
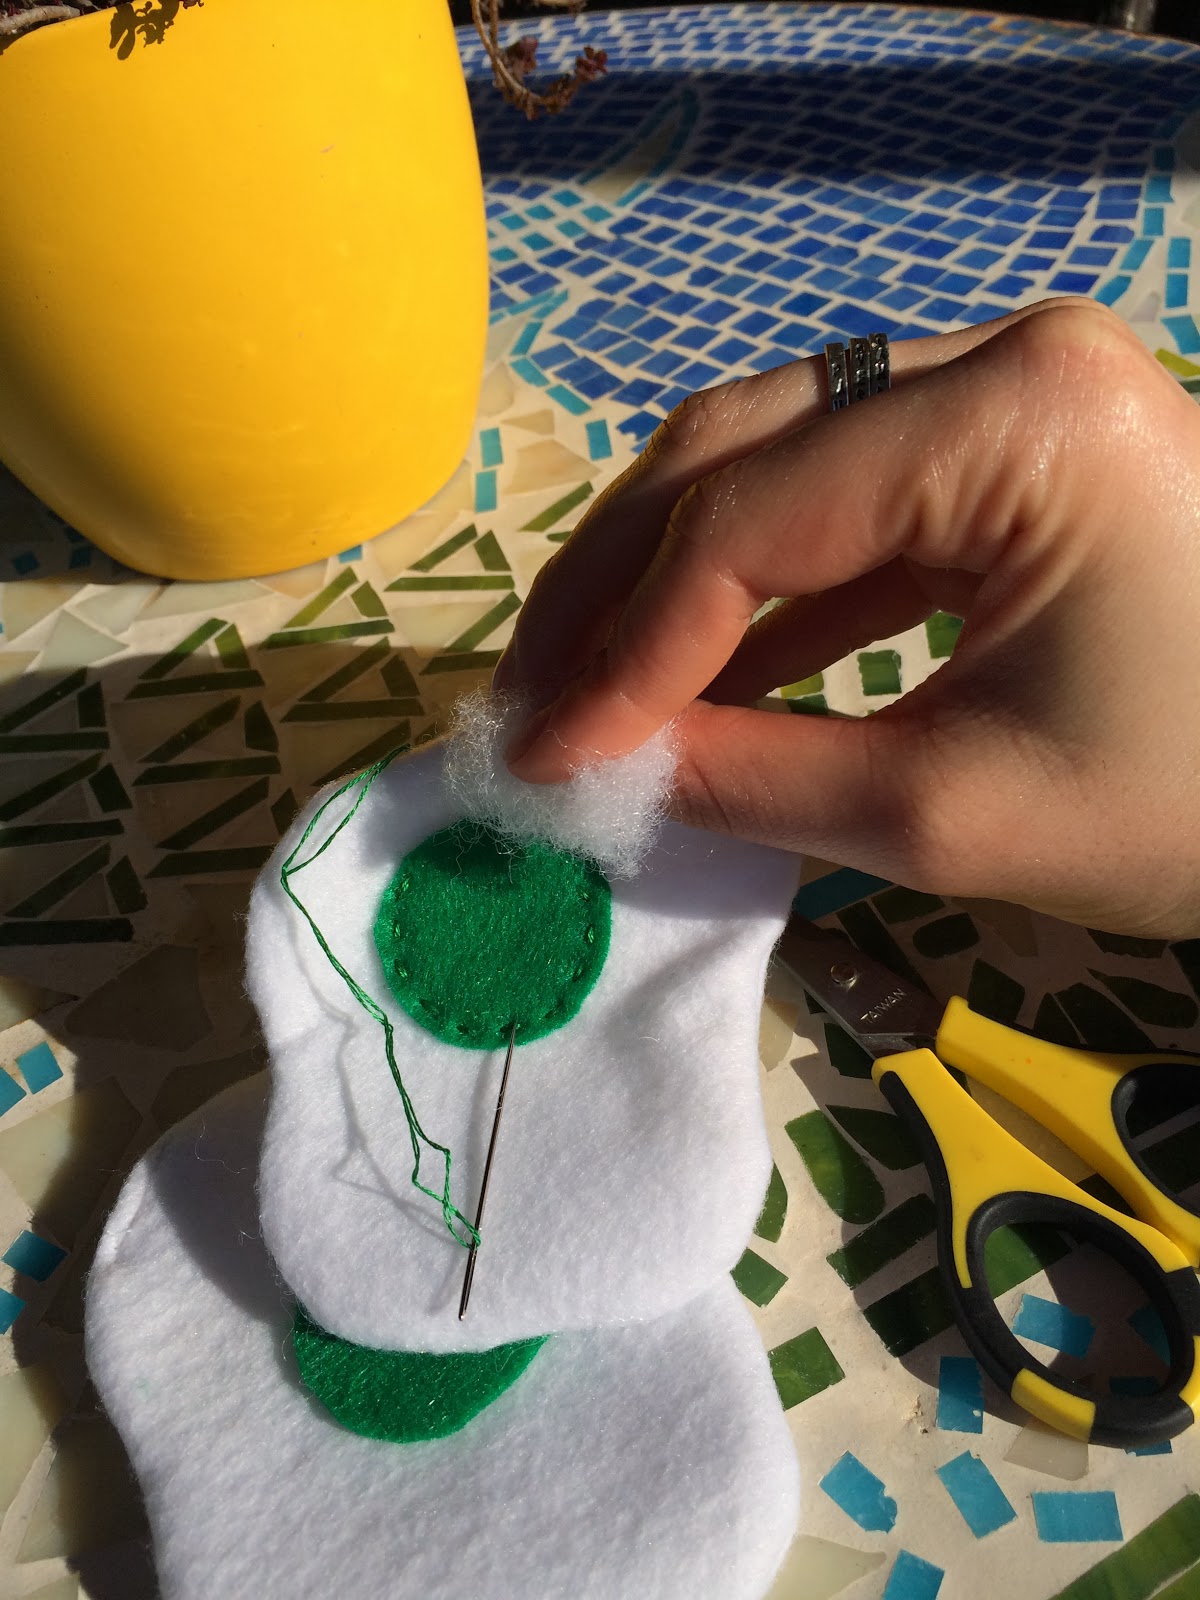
Finish sewing the yolks and.... Ta-Daa! A delicious green egg! Yummy!

Now, you could stop here. Or, if you're feeling adventurous, we can try some felt ham. :)
This is where my life became a little tricky, and a bit frustrating.

This is the "ham" that Sam I Am offers:

Besides the color, there are a few differences. ;) So, let's just accept that Seuss-ian pigs must be a little different than ours... and remember that if Dr. Seuss can create silly things, you can too!
Make it your own, and if it's weird, it's still green.... so, it works. :)
*Disclaimer: Please know that at no point during this ham-making-venture did I have any idea what I was doing. Just needed you to know that. :)
Ok, I started with the idea to make one slice of this strange ham.
Choose your green and cut whatever hammy shape you like, twice.

I cut out some white felt to make the ham "bone." Mine was a little different than the book's illustration, but remember yours can look like whatever you want!

I used the sewing machine to sew on the "bone", but you could use a quick running stitch (or glue!), to attach it by hand.

Next, I used white thread to make some of the swirls/striations in the ham. I used a simple back stitch to embroider the ham. (Here is a good backstitch tutorial, if you're interested!)
This is optional, of course! You could also use puff paint, or omit it all together!


Ok, now it's time to sew your two green felt pieces together. :)
.... So, do you want to see one of my "I'm going to set this on fire" moments?

Yep. (I sewed the wrong sides facing each other, so, if I turned it inside out to hide the seam, it would have been, well, even weirder than it already was.)
This was one of those times for me....
Just. Walk. Away.
Lesson learned... think about what you're doing before you do it. :) (And always make sure you have a seam ripper handy.)

Grrrr.
Let's try that again....Sew your "ham" with the right sides together (just like the egg), and then turn it inside out.

Now, add a little stuffing, to your liking, and close the seam.
I used a whip stitch this time. :)


(I also highly recommend watching youtube videos of Jimmy Fallon being ridiculous on the Tonight Show, while you sew. It helps ease the craft headache.)
And, wow! Look-- you made green eggs and ham!
Grab that boat and goat, and eat up!
..... Unless, you're COMPLETELY RIDICULOUS like me. In which case, you may decide that you can't just have a slice of this ham, you need the whole ham.
(Good grief, what is wrong with us?)
**You'll need about one whole sheet of felt for the "body" of the ham, so just make sure you have enough handy.
Ok, first, trace your slice of ham onto the same color green felt and cut it out.
Now, repeat the "bone" and embroidery steps with this slice, if you'd like.


Now, using a whip stitch, attach this front piece of the ham to what will be the body of the ham.
(This will vary depending on how big your ham slice is, but, for me, it took one whole piece of felt, length-wise, to go around this ham slice.

Once you've done this, sew the long sides of your long felt together to make one very strange green tube. :)
(Think of it like the bottom and side of the cupcake from last week.)
I cut out a piece of cardstock the size of the ham slice to place inside the ham for a bit of structure.


Now, add some stuffing to your ham, as much as you like!
Sam's ham has an interesting curvature, so I used a running stitch and pulled it tight, about half-way down the length of the ham, to cinch it in a bit.
(This is the same technique we used last week to make the "icing" ruffle on the cupcake.)


Next, I added a little more stuffing.

Now it's time to close the open seam of your ham. :)
I trimmed the felt a bit to make it more even, then I used a running stitch again. Pull the seam as tightly as you can to close it, then tie a knot.


Wohoo! The world's weirdest ham is now complete!.... Unless you have the same tendency I have to "guild the lily."
I used some more green thread to make some stripes/markings along the ham.


Ok, now, for real, you're done!

Not to bad!.... I'll try it, Sam I Am!
Ok, confession time:
Immediately after I finished, I thought, "Why in the world did I make this?" Ever been there? Excited about a project, and then second-guessing whether you did a good job, or whether it was "worth it"?
But here is an important lesson I've learned.... Crafting, creativity, and imagination don't always have to have a concrete "purpose." Everything doesn't have to be practical to be purposeful! Here are some of the "purposes" I embraced while making green eggs and ham this week....
Problem solving, practicing patience (ugh.), finding a creative outlet,
and discovering a new way to have fun with the little people in my life :)

Green eggs and Legos? Why not? :)

...And seriously, is she not the cutest consumer of Green Eggs and Ham you've ever seen?


So, what do you want to make?
"Caterpillar food" to go along with The Very Hungry Caterpillar? Cookies for the kid in your life who loves If you give a Mouse a Cookie? Just do it. You'll be so glad you did!
Enjoy!
Ok, two more weeks of (non-food) felt projects in March before we move on to something different in April... so I'll see you next week!
...and Happy St. Patrick's Day!

No comments:
Post a Comment