Friday, June 6, 2014

Festive Paper Keepsakes :)


Happy JUNE! .... and Happy Summer VACATION!!! 
(for those who happen to be lucky enough to get Summer vaction.) ;)

We're going to be working with paper this month, and I'm going to do my best to channel the paper-craft-queens in my life. 
**Christina and Maria-- please don't laugh at my mod podge skills!

Paper is one of the most fun materials... it's inexpensive, incredibly varied and has a million and one possible applications!

Need to decorate some cupcakes? Done!

Need some Valentines for the sweet people in your life? Sure thing!


Need some quick decorations for a party?  Of course! 
**But you can make this one... please don't spend $13 at Target. :)


Today we're going to celebrate whatever you want.... graduations, weddings, birthdays, you name it!

This idea came from an amazing friend who made me cry with the ornaments she made using my wedding program.

Since it's graduation season, today I'm going to make an ornament keepsake using a graduation announcement from a pretty fantastic Clemson graduate.  (She's the only person I'd use orange and purple ribbon for... even if it hurts.)

Ok, ready?

Materials:
-Clear craft Christmas ornament (you can find these in the glass section at Hobby Lobby any time of the year, but they're starting to bring out Christmas decorations now, [ridiculous], so you shouldn't have any trouble finding them!)

-Invitation/Program/Announcement/etc.

-Scissors or paper cutter

-Mod Podge (optional)

-Ribbon


Here we go!


Your ornament can be big or small, depending on how much paper you want to put in it, or how you want it to look.


First, you'll need to cut the paper you're using.  Be intentional about what you want the recipient to be able to see... specific words, phrases or colors/patterns from the paper?


Once you have enough paper cut, you're ready to twirl it!  You could also just put straight slips of paper in the ornament for a different look, it's up to you!


I use a crochet hook, a pencil, or my finger to wind up the paper.  How well the paper will retain this shape depends on the thickness of the paper.  

Once you've wound up the paper, remove the top of the ornament and insert the paper.  


Replace the cap, and you could stop here. If you attach a ribbon for hanging, you're done!

Because this was a graduation announcement, I decided to cut out the school's seal to use as a "charm" on the outside of the ornament.  

To make this piece of paper a bit more substantial, as I hope it will adorn a Christmas tree for many years, I used Mod Podge.


If you haven't used Mod Podge for a decoupage creation before, think of it as a thicker white glue that can seal and solidify just about anything.  Check out this website for more information and awesome ideas:

Mod Podge comes in glossy and matte finishes, but I chose glossy.  
I just like a little shine in my life. :)
For me, the easiest and most effective way to apply Mod Podge is with a foam brush, which you can find in any store's craft section.
Follow the instructions on the bottle, and you're all set!

You should place the paper you're sealing on something that won't stick to it, and that you can bend to peel it off easily.  I used a sheet protecter, but you could use clear food wrap or wax paper.


I applied several coats to the front of the paper, then did the same for the  back.


Once this piece is dry and ready, you can use a screw punch, or even a needle/thumbtack to make a hole in it.


Once that is done, you can use some string to tie it onto the ornament.  Then tie some pretty ribbon for hanging...


And.... Done!


Think of the possibilities... save the wedding invitations that come in the mail, and you can create a special, beautiful Christmas ornament as the wedding or first Christmas gift for the sweet couple!
I imagine you could do the same for a 1st Birthday invitation, birth announcement, or whatever you like!  Be creative!

This is a good idea to keep handy.  I know I'm incredibly sappy and sentimental, but the sweet ornaments I received make me tear up every year when I put them on the tree. :)

Congratulations Emily!!!

Have fun, and stay tuned for more paper fun next week!
Thanks for reading!

Friday, May 30, 2014

Cleaning up the scraps: Fabric Bracelets


Hello all!

So, somehow I missed that there are five Fridays in May.  Thankfully, this week I received the loveliest and most well-timed inspiration in a package from my incredibly crafty and creative great-aunt.... Thank you Titi Magda! :)

So, we're going to use up more fabric scraps this week and make some bracelets!

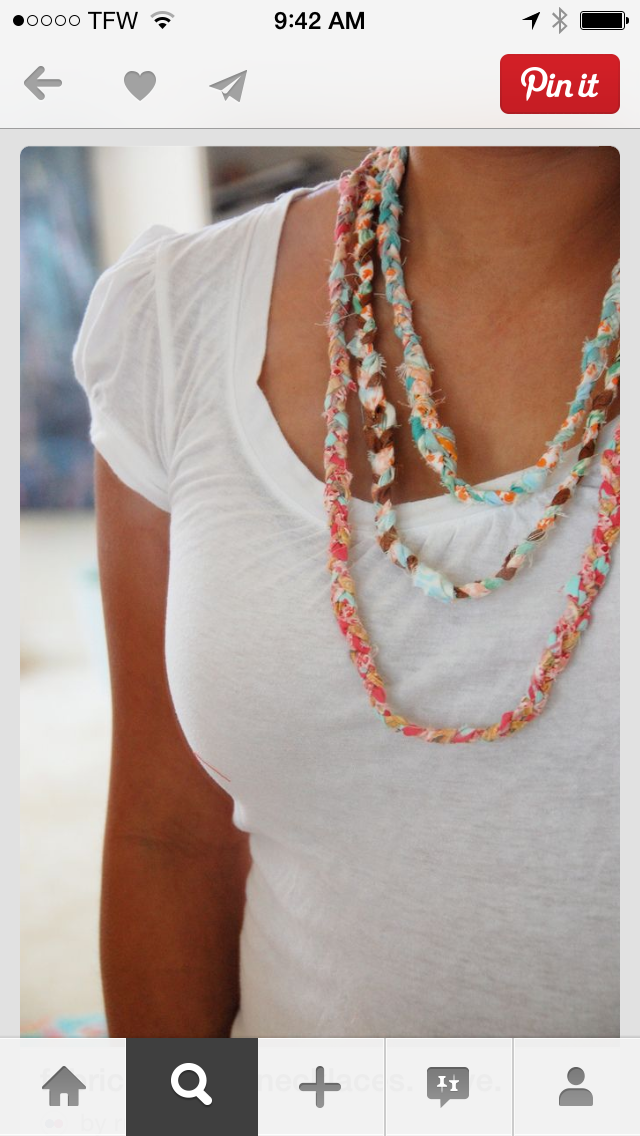
Here are some of my Pinterest inspirations:

(Seriously, when I find some fun printed jersey, I'm totally making this.)


You can also check out this fabulous Etsy shop for some cool fabric jewelry:


Feeling inspired?
Good, let's go!

Materials:
-Fabric of your choosing
-Scissors
-Ribbon pinch clasps (optional)
-Jump rings and clasps/closures (optional)
-Needle nose pliers (optional)
-Needle and thread (optional)


First, pick your scraps, then cut them into strips of ~1 inch.


I decided to use ribbon pinch clasps to use several strands of fabric and make the sizing adjustable.  You could certainly avoid all of the hardware by giving yourself extra fabric and just tying the ends together with a pretty knot.  I just like the hardware, but it's completely up to you!
I found these at Hobby Lobby, but you can check any local craft or bead store for something similar!

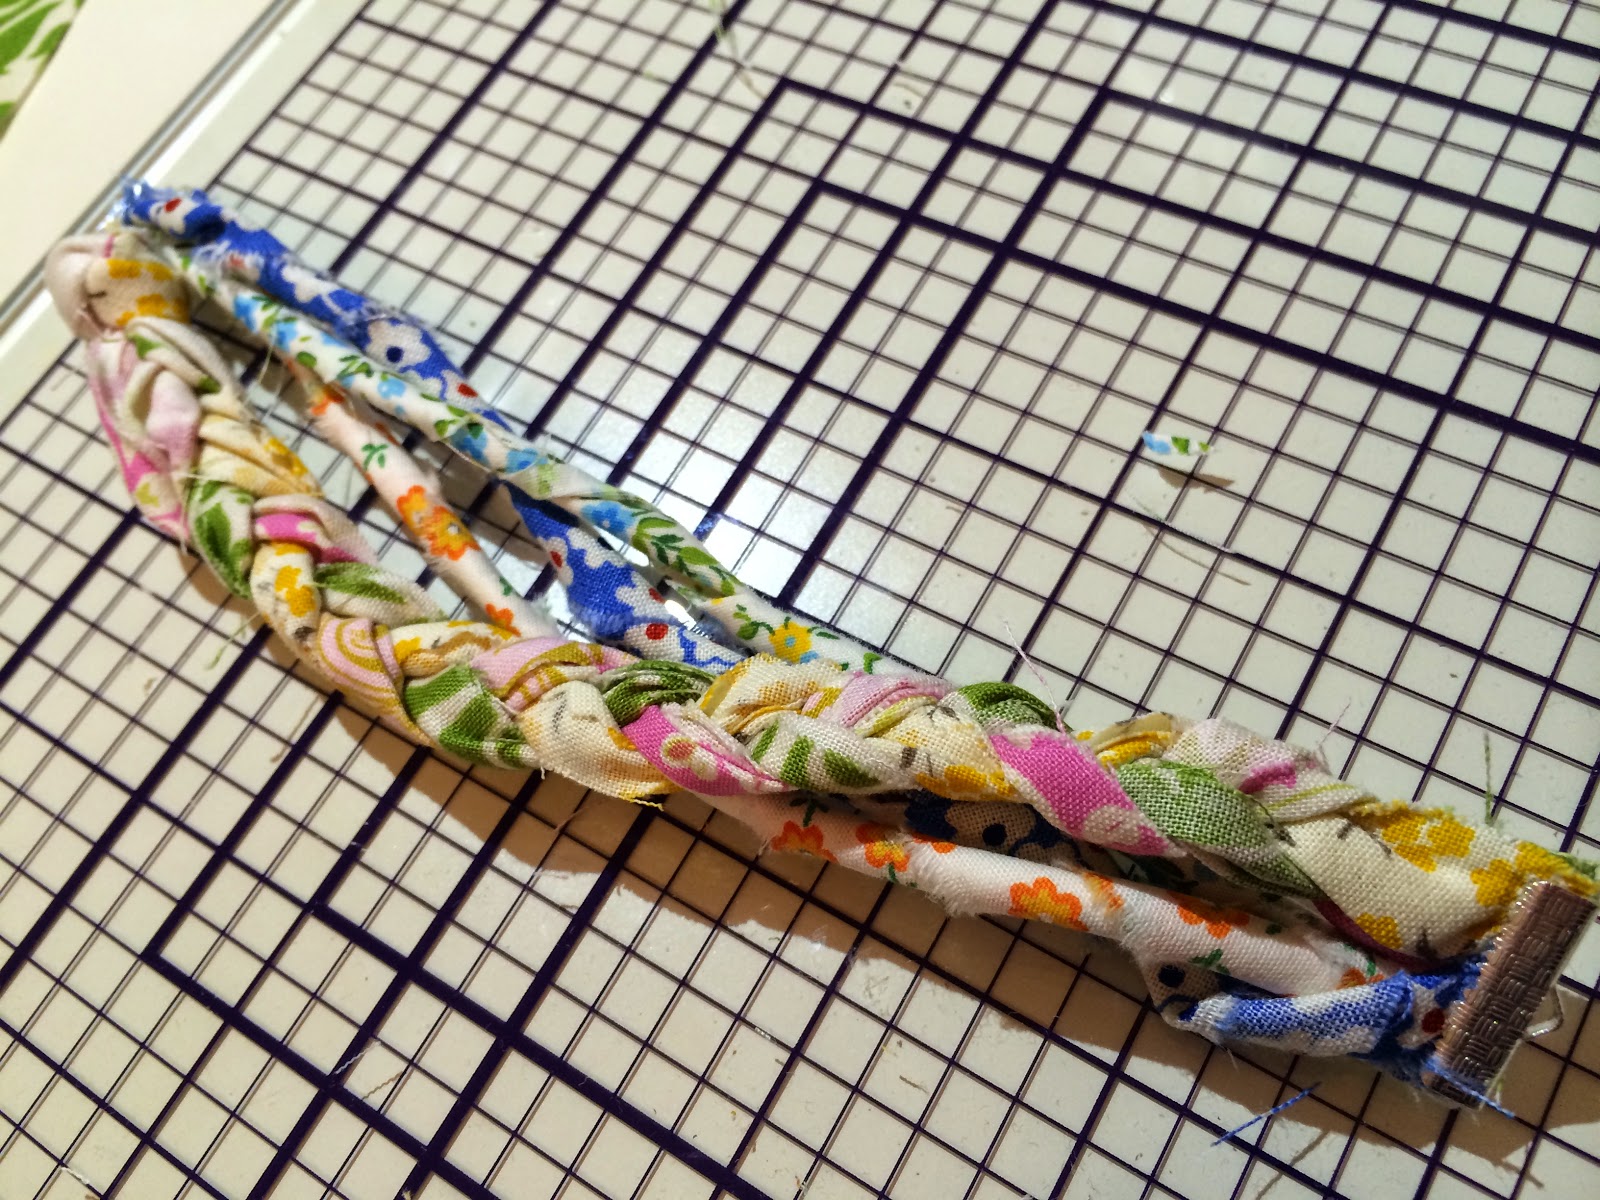
You can braid or twist the fabric.... get creative!
I used clamps and clothespins to hold my strands in place while I was working.


Once you have the desired length, trim the ends to make them even, then insert the ends into the open ribbon pinch clasp.  

(Again, you could just tie a pretty knot here instead of using the clasps!  Just be sure the size is suitable for sliding over your hand, but not too big that it will fall off later.) :)


Tip:  To get the fabric into the clasp in one piece, it helps to use a few stitches with a needle and thread to secure the pieces.


Once you're happy with the placement of the fabric, use pliers to close the clasp as securely as you can.


Ok, now all you need to do is attach whatever kind of closure or clasp you want to the ribbon pinch clasp.


Use pliers to open a jump ring.  Then carefully slide the closure and ribbon pinch onto the ring.  Use your pliers to close the ring.  Follow the same step to attach a jump ring to the other side.  Now you have a ring for your clasp.  
Done!
You can find jump rings in any size.  You can use them as spacers or connectors for all kinds of jewelry projects.


This is a lobster claw clasp, but you can use any clasp you like!


Pretty!


Now repeat with as many scraps as you like-- have fun!

This is a super simple and fun gift idea (teacher gifts, anyone?)-- and something you could totally make with kids who are immediately bored on summer vacation. ;)


We'll be experimenting with paper crafts next month, so stay tuned!  Have a great weekend!!

Friday, May 23, 2014

Cleaning up the scraps: Braided Headbands


Happy Memorial Day weekend everyone!


To celebrate the holiday, we're making an extremely quick and easy craft!  You need all the time you can get at the pool/lake/beach/parade/picnic... etc. :)

This was inspired by a Pinterest pin that I've had on a board for ages.  It's a little bit nostalgic for me because my mom used to make really fabulous braided ribbon headbands for my sister and me, way back in the day.  ...And I'm not kidding when I say fabulous. :) 
I still love headbands, and this is a great, easy way to update old headbands that you don't like and use up leftover fabric scraps.

I used scraps of jersey knit from the square-circle skirt project.  It's stretchy and perfect for making a headband. If you have any old t-shirts you don't like to wear anymore, you can cut it up to make one of these headbands! :)


Let's get to it!

Materials:
-Scrap fabric (I used jersey, but any material would work... lace, cotton or whatever you have on hand!)
-Hot glue gun
-upcycled or plain headbands
-needle and thread (optional)


Ok, to make the headband, you'll need one strip of fabric about 1.5 times the length of the headband you're covering.

Glue to secure the fabric on one end of the headband and start wrapping the fabric around it.  Use glue as needed along the headband to keep the fabric from sliding.


Glue at the other end and trim any excess fabric.


Lovely!

You could stop here-- I think this headband is already fun!

To make the braid, you need three strips of fabric.  I tied a knot in one end to keep the ends together.


If you're a nurse and a hoarder, like me, you may have a pair of hemostats lying around, that you can rig up to make the braiding easier.  ;)  If not, I'm sure you'll come up with a creative way to hold the fabric so you can braid it. :)


Once the fabric is braided, make sure the braid matches up well to the headband.  You may need to go back and make the braid looser or tighter to line up better with the edges of the headband.


I tied a knot in the other end, and then glued the braid to the headband. Use the glue to press down on any "flappy" edges. :)


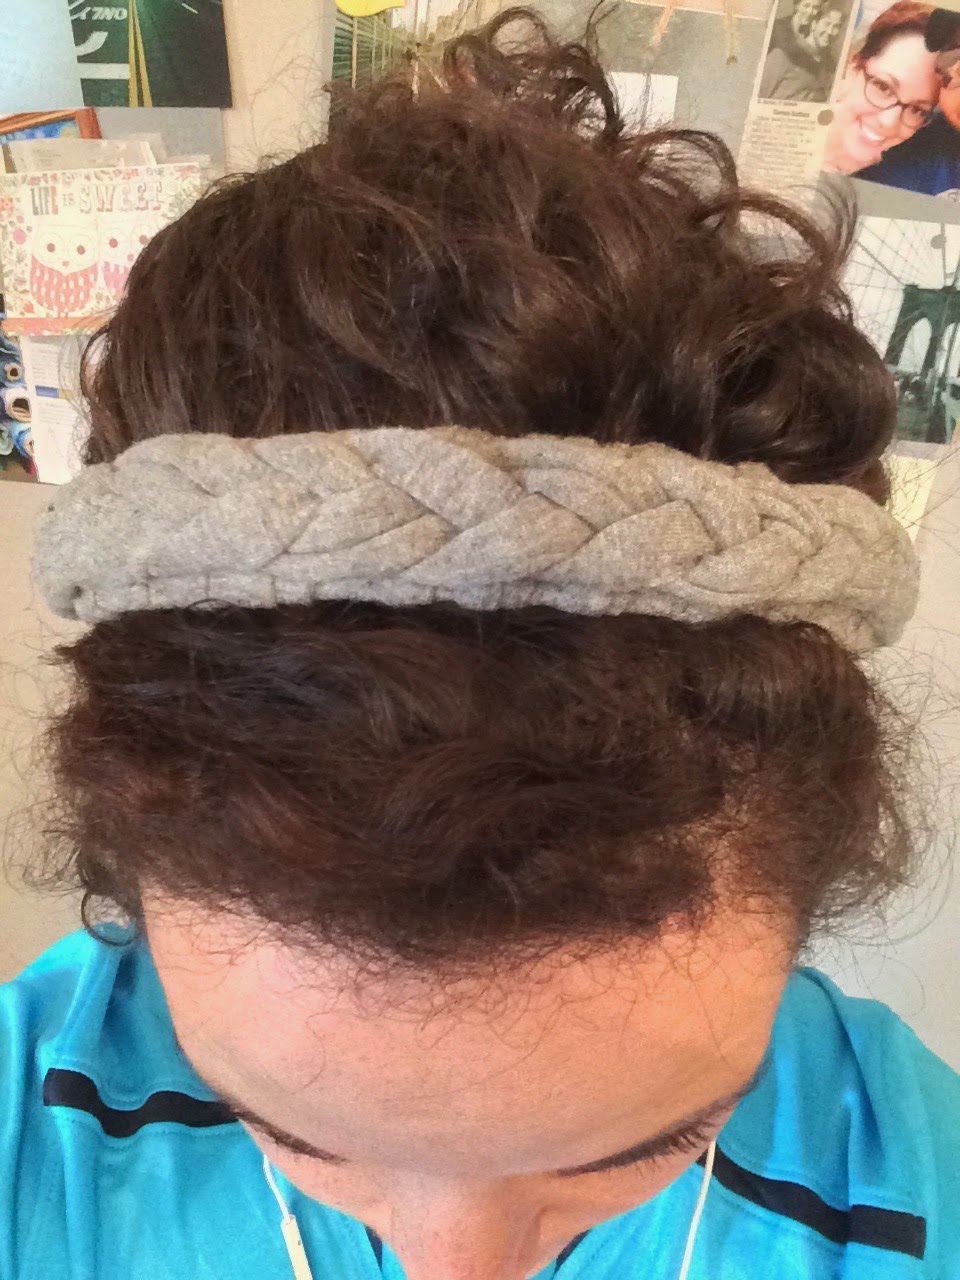
Done!  I think it's pretty cute!
(Disclaimer: I'm not great at selfies.  If anyone wants to be a future blog model, let me know.) ;)


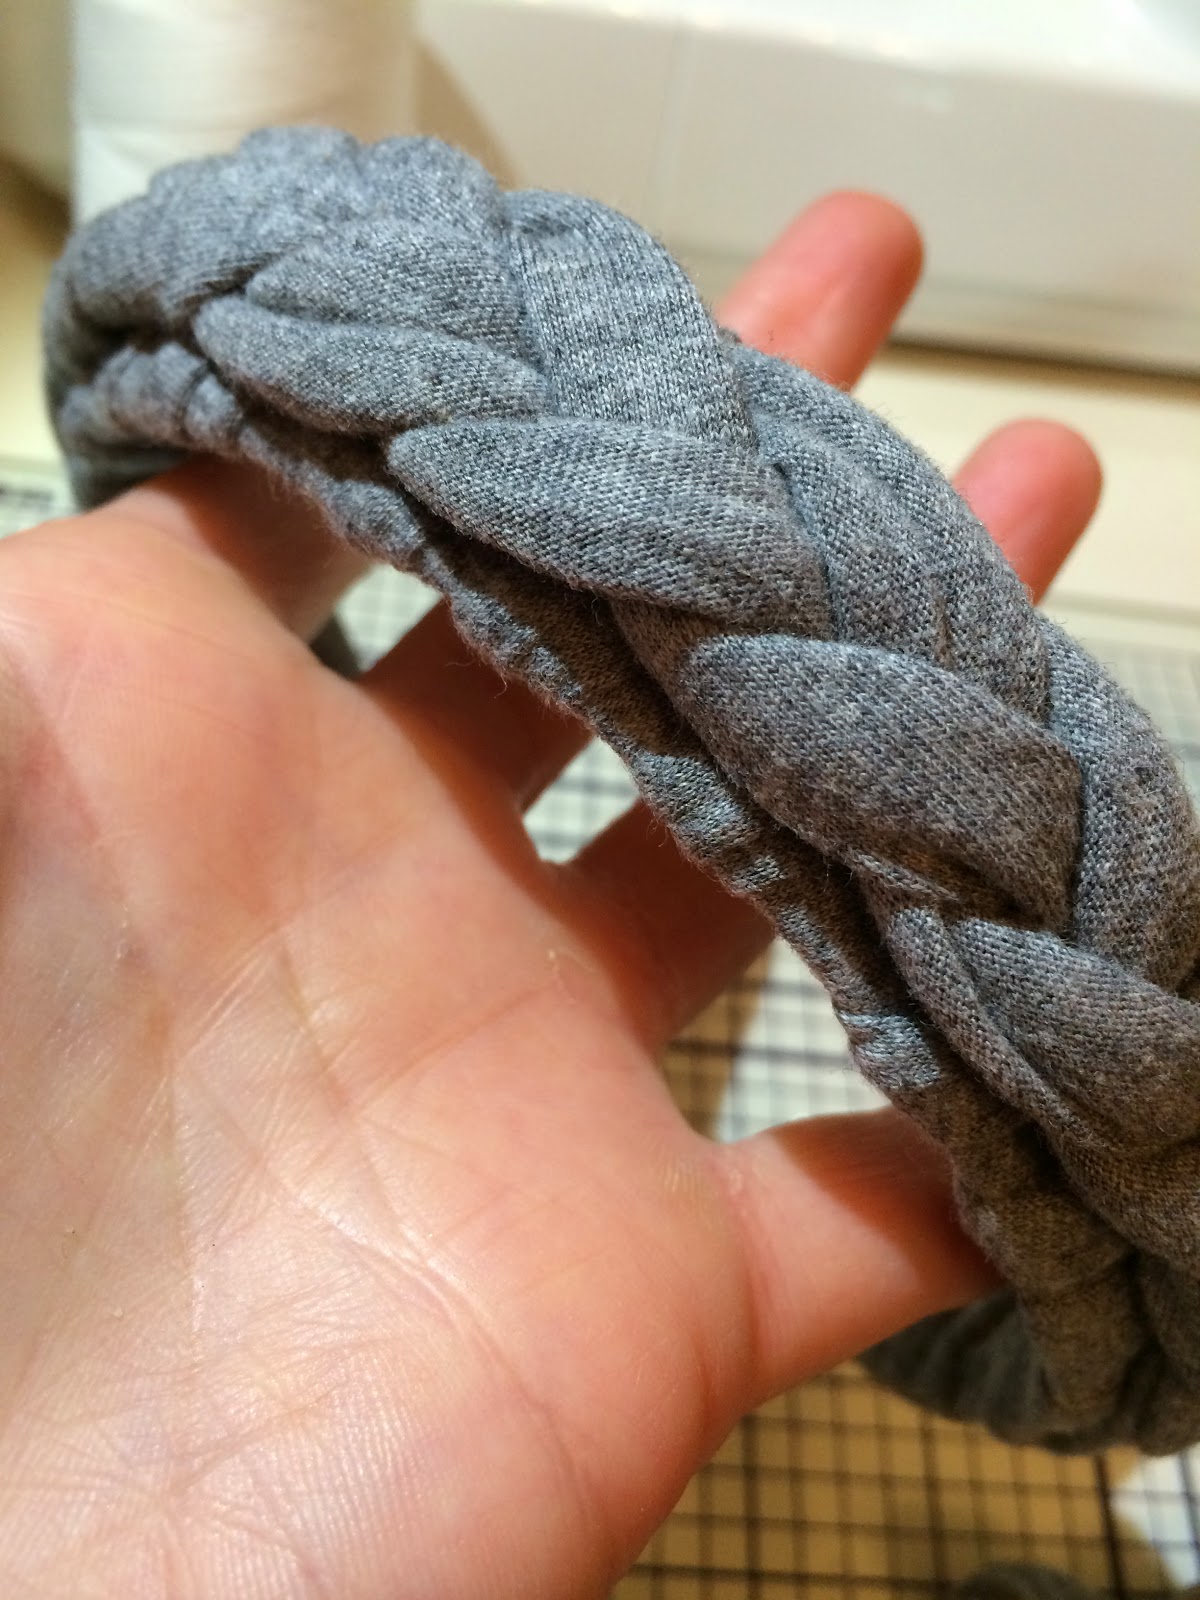
Now, if you want a little variety, you can also make a stretchy braided headband.  This would definitely work best with any jersey knit.

Just make the braid a little longer than you did for covering the headband, and when it is the desired length, sew the ends together.


See?


I absolutely love the athletic headbands you can find like these:

But who wants to pay this?


Umm, not me.

This braided headband is an awesome alternative! Since it will be custom-made for you, by you, it will be a lot less likely to slip off of your head. :)  The store-bought headbands are usually just a little too tight for me, which means they pull my hair, rather than holding it, and then they slide back.  Not my favorite look.

So, have fun and take 5 minutes to make a headband!  You'll love it. :)


Have a great weekend!